These are instructions on how to jailbreak your iPod touch using iLiberty+ and Windows.
Before following these instructions you should have already restored your iPod touch to 1.1.4 using iTunes. You should have the iPod connected to your dock/computer and iTunes should have detected the iPod after restore at least one once!
Step One
Download iLiberty+ 1.2 from here to your desktop.
Step Two
Double click the downloaded file (iLibertySetup_1.2.0.65.exe) on your desktop to launch the install program.

Step Three
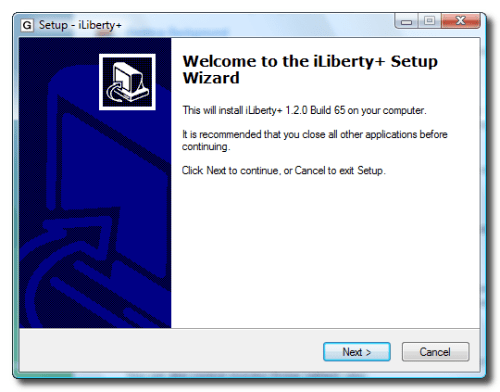
Click the Next button to begin installation.
Step Four
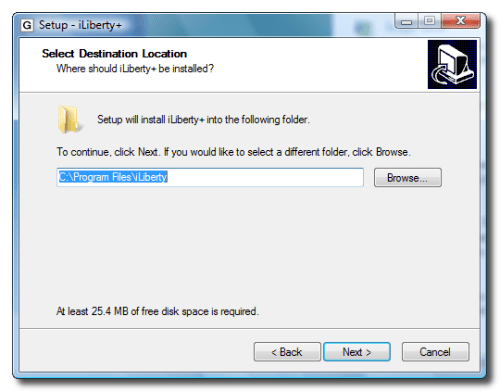
Select the location to install iLiberty+ in and click the Next button.
Step Five
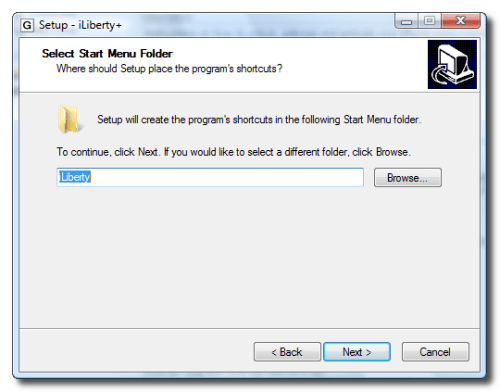
Enter a name for the iLiberty+ Start Menu Folder and click the Nextbutton.
Step Six
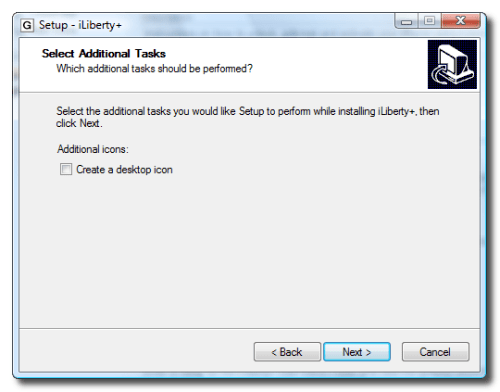
Check the box if you would like to add a iLiberty+ icon to your desktop then click the Next button.
Step Seven
Finally, click the Install button.
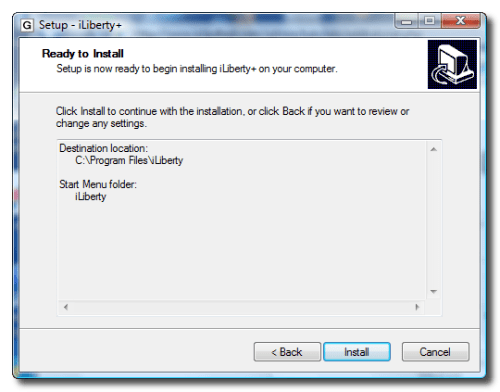
Step Eight
Once installation is complete you will be given the option to launch iLiberty+. Check the box next to Launch iLiberty+ then click the Finish button.
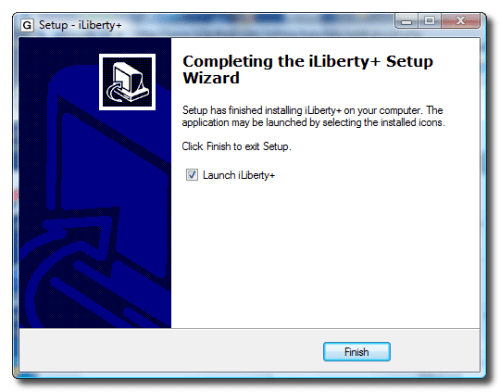
Step Nine
iLiberty+ will open onto the standard tab. Check the operations you would like to perform. If you are jailbreaking an iPod touch then you only have to have Jailbreak selected.
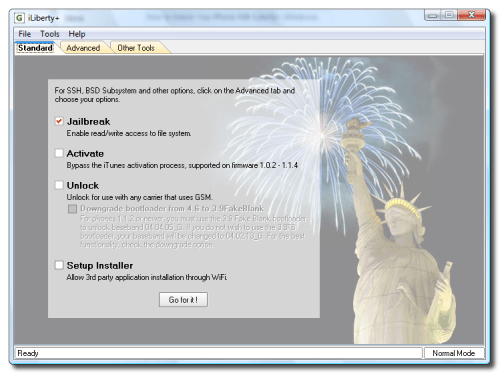
Step Ten
Click to select the Payloads tab. From here you can select additional payloads to install while jailbreaking. We will leave this alone for now and go back to the Standard tab. Note***: A tutorial on how to download and install payloads will be posted in the near future.
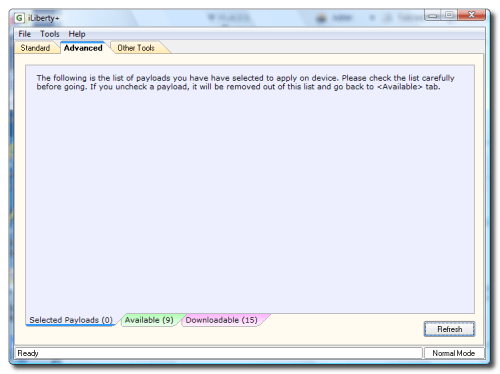
Step Eleven
Click the Go for it! button from the Standard Tab to begin.

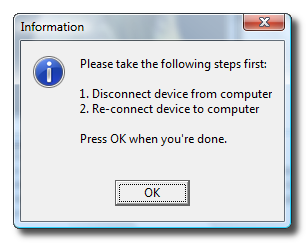
Next I got a message that asked me to disconnect then reconnect my iPod touch and click the OK button.
Step Twelve
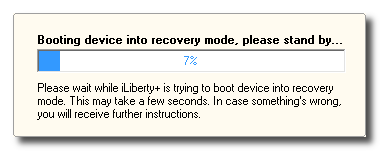
You will then notice a status bar appear. Unfortunately, mine only displayed until around 13% when the iPod rebooted into recovery mode and then it disappeared. No worries though, the jailbreak procedure continued and finished successfully. I was not notified that it did by the software. Just watch your iPod until it comes to rest at the \"Slide to unlock\" screen.
THANKS***: A lot of thanks go out to AViegas, George Zhu, Dev Team, and whomever else contributed to this release!
Before following these instructions you should have already restored your iPod touch to 1.1.4 using iTunes. You should have the iPod connected to your dock/computer and iTunes should have detected the iPod after restore at least one once!
Step One
Download iLiberty+ 1.2 from here to your desktop.
Step Two
Double click the downloaded file (iLibertySetup_1.2.0.65.exe) on your desktop to launch the install program.

Step Three
Click the Next button to begin installation.

Step Four
Select the location to install iLiberty+ in and click the Next button.

Step Five
Enter a name for the iLiberty+ Start Menu Folder and click the Nextbutton.

Step Six
Check the box if you would like to add a iLiberty+ icon to your desktop then click the Next button.

Step Seven
Finally, click the Install button.

Step Eight
Once installation is complete you will be given the option to launch iLiberty+. Check the box next to Launch iLiberty+ then click the Finish button.

Step Nine
iLiberty+ will open onto the standard tab. Check the operations you would like to perform. If you are jailbreaking an iPod touch then you only have to have Jailbreak selected.

Step Ten
Click to select the Payloads tab. From here you can select additional payloads to install while jailbreaking. We will leave this alone for now and go back to the Standard tab. Note***: A tutorial on how to download and install payloads will be posted in the near future.

Step Eleven
Click the Go for it! button from the Standard Tab to begin.
Next I got a message that asked me to disconnect then reconnect my iPod touch and click the OK button.

Step Twelve
You will then notice a status bar appear. Unfortunately, mine only displayed until around 13% when the iPod rebooted into recovery mode and then it disappeared. No worries though, the jailbreak procedure continued and finished successfully. I was not notified that it did by the software. Just watch your iPod until it comes to rest at the \"Slide to unlock\" screen.

THANKS***: A lot of thanks go out to AViegas, George Zhu, Dev Team, and whomever else contributed to this release!

No comments:
Post a Comment